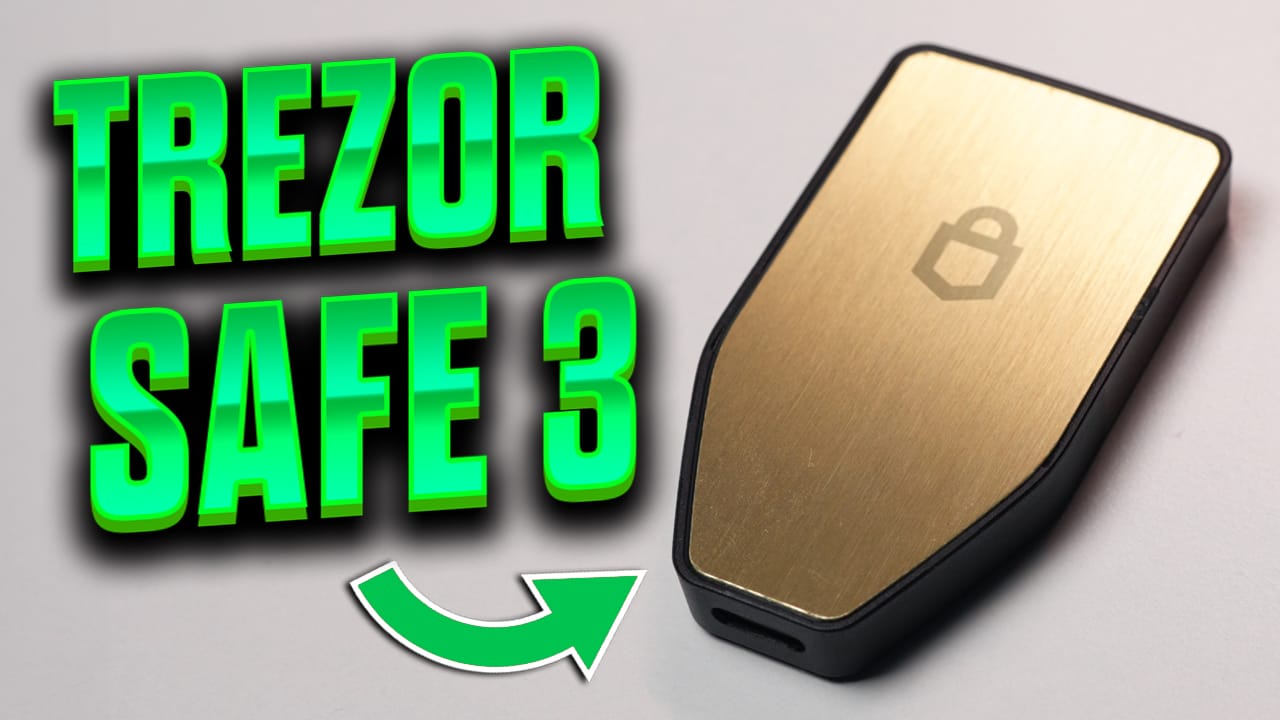
This is the Trezor Safe 3, the latest crypto hardware wallet from Trezor. It’s their first wallet to implement a dedicated secure element and it boasts new physical design elements that aim to bring Trezor’s original hardware wallet, the Model One, into the modern age. In this video I’m going to be giving you my in-depth and honest review of this self-custodial wallet, speaking from my personal experience. But first a quick disclaimer that this video is not sponsored. I purchased this product myself, and I have purchased many other Trezor products in the past. It is however made possible by those of you who support my work here and on the channel. Thank you guys for your support!
Updated July 2026: The Trezor Safe 3 now sells for $59, down from $79 at launch, and Trezor's range has grown to three models with the Safe 5 and the Safe 7, which was released in October 2025. I have added a current model comparison and a section on how the Safe 3 stacks up against Ledger. The original review and setup walkthrough below are unchanged.

Price & Variants
Coming in at a price of $59, the Trezor Safe 3 is the cheapest way to get a Trezor with a certified secure element, and it is now the entry point to the whole Safe range. It undercuts the Safe 5 by $70 and the Safe 7 by $190 while running the same firmware and supporting the same coins, so what you give up is screen and connectivity, not security. For a first hardware wallet that is good value.

The Safe 3 comes in four colours: Cosmic Black, Solar Gold, Stellar Silver and Galactic Rose. It makes no difference to how the device works, but if you own more than one wallet it is a genuinely useful way to tell them apart at a glance.
There is also a Bitcoin-only version of the Safe 3, which runs firmware that supports Bitcoin and nothing else. Less code on the device means less attack surface, so if Bitcoin is all you hold, take that one. Everyone else should stick with the standard model, which handles thousands of coins and tokens through Trezor Suite.
Accessories
For those of you wanting to customize your wallet, there is a range of accessories for the Trezor Safe 3 including a bumper case, sleeve and lanyard of various colors, as well as screen protectors and cables. If you're looking for a near indestructible seed phrase backup solution, I would recommend reading my Trezor Keep Metal review. It has options for 12, 18 and 24 word recovery seeds, as well as shamir backups. The full range of Trezor Safe 3 accessories can be viewed here.
Unboxing
It comes sealed in a tamper-proof package which is extremely important given that this device will be holding the keys to your crypto. You want to be sure it hasn’t been messed with in any way since it left the factory. Inside you get documentation, a USB C cable and the Trezor Safe 3 itself. Before you can use the device, you’ll need to remove the protective plastic from the front and back, as well as the tamper-proof seal which covers the USB C connection port. If you’ve used a Trezor before, the design and experience will be very familiar to you. It has the classic Trezor shape with 2 physical buttons on the front and port on bottom for connectivity. The Trezor Safe 3 however is their first model to offer a wider range of customization in terms of colors, with its brushed aluminum backplate. In my case, I got the gold one, but you can also choose from silver, rose and black.

Trezor Model One Comparison
Comparing the Trezor Safe 3 to its predecessor, the Trezor Model One, you can see that the footprint is pretty much identical and there has been a marginal increase in thickness. The buttons have been redesigned to allow for one handed operation, which was not previously possible, and they’re a lot firmer and clicky. A most welcome improvement is the USB C port which replaced the dated micro-USB port on the old model one. This has improved the connection to the device, and I haven’t had any random disconnects which were possible previously with some cables. Additionally, most people already have USB C devices and thus you only need to carry 1 cable with you that can be used for everything. The cable Trezor includes in the box is a decent USB C to USB C and thankfully long enough in length to be usable. If I recall correctly the cable they provided previously was tiny and awkward, thus I threw it straight in the bin. At the heart of the Trezor Safe 3 is the new secure element chip that serves 2 main functions. First it acts as an additional layer of security in protecting your PIN code and recovery seed from physical hacking attacks. Secondly, it helps prove the device’s authenticity as it contains a certificate from the factory which is used to generate signatures with which Trezor can verify authenticity of your device.

Trezor Safe 3 vs Safe 5 vs Safe 7
Trezor now sells three wallets in the Safe range. All three run the same open-source firmware, carry a certified EAL6+ secure element, and support the same coins. What separates them is the screen, the connectivity and the price.
| Trezor Safe 3 | Trezor Safe 5 | Trezor Safe 7 | |
|---|---|---|---|
| Price | $59 | $129 | $249 |
| Display | 0.96" monochrome, 128 × 64 | 1.54" colour, 240 × 240 | 2.5" colour, 520 × 380 |
| Input | Two physical buttons | Touchscreen | Gorilla Glass touchscreen |
| Secure element | EAL6+ certified | EAL6+ certified | Dual: TROPIC01 open-source + EAL6+ |
| Connectivity | USB-C | USB-C | USB-C, Bluetooth, Qi2 wireless charging |
| Open-source firmware | Yes | Yes | Yes |
| Coin support | Thousands | Thousands | Thousands |
Prices and specifications from trezor.io, checked July 2026.
The security story is the same across all three, so this is a comfort and convenience decision rather than a safety one. Buy the Safe 3 if you want the cheapest certified secure element and you are happy confirming addresses on a small monochrome screen. Step up to the Safe 5 if you check addresses often and want a colour touchscreen for $70 more. The Safe 7 is the one to get if you want Bluetooth and wireless charging, or if the TROPIC01 chip matters to you, since it is the first secure element whose design can be publicly audited rather than taken on trust.
Is the Trezor Safe 3 as Secure as a Ledger?
On the certification line they are level. The Safe 3 uses a Common Criteria EAL6+ certified secure element, and Ledger lists EAL6+ for the Nano S Plus, Nano Gen5, Flex and Stax, with EAL5+ on the older Nano X. Anyone telling you Trezor is a full certification tier behind is working from the pre-Safe generation of devices.
The difference that actually matters is what you can verify. Trezor's firmware is fully open source, so the code that handles your keys can be read and audited by anyone. Ledger's BOLOS operating system, which runs on the secure element, is closed source, so you are trusting Ledger's word about what it does. Ledger argues the chip vendor's non-disclosure terms make that unavoidable. That is a reasonable explanation, but it is still trust rather than verification, and it is the reason I keep recommending Trezor.
One thing no hardware wallet fixes: if your recovery seed is photographed, typed into a phone, or stored in a password manager, the secure element on either brand is irrelevant. The seed is the wallet. That is worth more attention than the EAL number.
Setup
Moving on now to the setup process, which many of you may already be familiar with, you’ll need to grab a computer and head to Trezor.io/start where you can download the Trezor Suite software for your respective operating system. Install that, open it, and then connect the Trezor Safe 3 to the computer. You’ll then be prompted to begin the setup where it first installs the latest firmware on the device and then checks that its authentic. After scrolling through a quick tutorial using the 2 buttons on the Trezor device you’ll reach the most critical part of the setup, the wallet backup. Most people will go with the standard seed backup option, but for more advanced users there is the ability to create a Shamir backup. For this step, open the getting started package and among documentation and stickers you’ll seed phrase backup cards. Follow the prompts on the device screen and write down the words displayed in order. You’ll need to confirm some of these words before you’re able to proceed to the next step, which is setting the device pin. I also recommend that you write that pin number down on the recovery seed card just in case you forget it. Trezor Suite will then ask you to select some coins you wish to activate in your wallet. If you don’t see a specific coin you’re looking for in this list, don’t worry we’ll get to that later. The final step is setting a name for your device and customizing the screen background if you wish to do so. And that’s it! The Trezor Suite will load up accounts for the coins you selected and you’re ready to start using your wallet.

Supported Coins
There are no differences in software features between the Model One and the new Trezor Safe 3, it’s exactly the same except for a few differences in supported coins. For some reason, while the Safe 3 added support for some assets, it dropped support for a few coins as well such as Dash, Digibyte, Namecoin and some others. Though I’m not sure if this is a big deal because I think those coins are pretty dead anyway. The coins that support has been added for are highly ranked in terms of market cap and user interest right now, like Cardano, Ripple and Monero. You should still go to Trezor.io/coins to check if assets you intend to store are supported before purchasing this product. Another thing is that not all the coins, even though supported, are supported by Trezor Suite itself. You will have to connect your Trezor to other wallet software such as Exodus, to manage those assets.

Trezor Suite Overview
The Trezor Suite is actually my preferred management software when it comes to hardware wallets. Primarily due to the fact its interface is clean and free from bloat or advertisement, while still maintaining a lot of functionality that users have come to expect. Sending and receiving is straightforward, by clicking receive the address for your selected account will display on screen in plaintext and with a QR code, which you can then authenticate by looking to the screen of your device. When sending, there’s the ability to set custom variables for things like your transaction fees, and then you approve the transaction on your hardware wallet. Accounts can be labelled for various purposes like a savings account and a trading account, but you can’t add additional accounts for coins until the existing account has a balance in it. Which is a bit of an inconvenience. Buy, sell and swap functionality is built in, including the ability to dollar cost average, but this is not something I’d use personally as I like to use a dedicated trading platform for this type of thing. The Trezor Suite is also able to handle the use of multiple Trezor devices quite well, if you have more than one like I do. Every time you connect a Trezor device it will automatically detect all your account balances and there is no need to add them manually. In terms of mobile device support, Trezor has a companion app called Trezor Suite Lite which lets you scan in your accounts from the desktop version of Trezor Suite. After doing this, you can then monitor your account balances on the go as their value fluctuates. There is also the option to receive funds into your accounts, but no option to send. So if sending funds with your mobile device is a requirement for you, Trezor devices are a no-go and you’ll have to look elsewhere.

Exclusive Features
There are some cool features I’d like to mention that are exclusive to Trezor. If you’re a Bitcoin user that wants to enhance your transaction privacy, it has CoinJoin support. You can also use your Trezor as a 2FA key to increase your login security for various accounts. I think this is great for the average user, who probably doesn’t have a dedicated Yubikey. Then there is hidden wallets. When you first connect your hardware wallet to Trezor suite, you’ll be asked whether you want to open the standard wallet or a hidden wallet. What hidden wallets allow you to do is create accounts that can only be accessed by inputting a specific password, it is otherwise invisible. This feature is useful in the event that you are compelled against your will to provide access to your wallet. You can store most of your funds under a hidden wallet, while having some small amounts in the standard wallet which acts as a decoy. If you’re doing this there is one consideration, being that these accounts and the funds held therein can only be accessed if you have the password. So, you’ll need to back that up in addition to the recovery words you wrote down during the initial setup. That brings us to the final feature, which is probably the reason why most people choose Trezor to store their cryptocurrency. It’s the fact that it has an open source design, meaning that all the code that runs on the device is publicly available for anyone to audit. Over the years, plenty of cryptocurrency security experts and developers have looked it over and are satisfied enough to store their crypto on Trezor devices. Many competing hardware wallets on the other hand are closed source, meaning their source code is hidden from the public and we are unable to tell what is exactly going on and thus we are putting complete trust in the company that provides the device. With Trezor, no such trust is required.

Trezor Safe 3 Cons
Up until this point I’ve mostly covered the positive things, so lets go over some cons that I’ve identified. The first is not a massive issue for me but I noticed that just from a few weeks of use, where I throw the Trezor Safe 3 into my bag pocket with other Trezors, the screen has accumulated a number of scratches. It hasn’t impacted my ability to see or use the screen, but if you look closely it is noticeable. It would have probably been better if they used a gorilla glass screen, which has greater durability. Also worth noting is that this was never an issue with any of my much older Trezors, its just been introduced with the new plastic material that covers the sceen. I mentioned earlier that there is no ability to send coins from the Trezor Safe 3 with a mobile device. That may or may not be an issue for you, depending on how you use your hardware wallet. But I think it’s a feature Trezor is sorely lacking and it would be good to see at some point in the future via software update or even in new iterations of the device. What I’d also like to see is more native support for coins in the Trezor suite so that it’s easier to track coin balances and their value. I’m not a huge fan of having to manage coins through multiple different wallet softwares and ideally I’d like to be able to do all that from one place, but this isn’t a deal breaker for me. My greatest issue with the Trezor devices is that on Ethereum accounts there is no ability to hide tokens from the UI. If you hold Ethereum, you’re probably aware of the fact that people send spam or scam tokens to active addresses. In the Trezor suite, these have completely clogged up the user interface and makes it difficult to differentiate between real and authentic versions of tokens like USDT or USDC. Not only that but I also get advertised to by these people every time I pull up my Ethereum account. According to Trezor developers they have been working on functionality to hide tokens from the UI, but they have been saying this for years now and nothing has been done about it despite myself and other users complaining. This issue has really been bugging me and if there are any Trezor people watching this video, I would implore you to do something about it ASAP.

Personal Experience and Final Opinions
This brings us to the conclusion of the video and the question, should you buy the Trezor Safe 3? In my opinion, and based upon my experience, the Trezor Safe 3 is without a doubt the best entry level wallet for both new and experienced crypto holders. At $59 it is the cheapest way to get a certified EAL6+ secure element, and that is not much to pay for the peace of mind. The fact that it is open source makes this device leagues better, from a security standpoint, than any closed source competitor. If you already own a Safe 5 or a Safe 7 there is no reason to move down, and if you are still on a Model One or Model T, the secure element in the Safe 3 is the upgrade worth making. If you don't currently own any hardware wallet you should definitely consider picking up this one. You can use my affiliate link which greatly helps to support my work here on the channel. Otherwise, I hope you all enjoyed this review. Make sure to like, share it and subscribe to the channel for more awesome crypto content.
More Hardware Wallet Reviews
I have reviewed most of the wallets people cross-shop against the Safe 3: the Trezor Keep Metal for seed backup, Block's Bitkey, the Ballet Real Series for people who want no setup at all, and the imKey Pro.
Frequently Asked Questions
What is the Trezor Safe 3?
The Trezor Safe 3 is a hardware wallet from SatoshiLabs that stores cryptocurrency private keys offline. It sells for $59, uses a Common Criteria EAL6+ certified secure element, runs fully open-source firmware, and connects over USB-C with a 0.96-inch monochrome display and two physical buttons.
How do you set up a Trezor Safe 3?
You set up a Trezor Safe 3 by connecting it over USB-C and installing firmware through the Trezor Suite app, then creating a wallet, writing the recovery seed onto the supplied recovery cards, and confirming it back on the device. The process takes about ten minutes and never displays the seed on a computer screen.
Where can you buy a Trezor Safe 3?
Trezor sells the Safe 3 directly at trezor.io for $59, and also through authorised resellers. Buying from the manufacturer or an authorised reseller is what protects against supply-chain tampering. Trezor advises against buying any hardware wallet second-hand or from third-party marketplace sellers.
What is the difference between the Trezor Safe 3 and the Safe 5?
The Trezor Safe 3 costs $59 and has a 0.96-inch monochrome display operated with two physical buttons. The Trezor Safe 5 costs $129 and has a 1.54-inch colour touchscreen at 240 by 240 pixels. Both run the same open-source firmware, use an EAL6+ secure element, connect over USB-C, and support the same coins.
Is the Trezor Safe 3 as secure as a Ledger?
Both use certified secure elements. The Trezor Safe 3 carries a Common Criteria EAL6+ element, and Ledger lists EAL6+ for the Nano S Plus, Nano Gen5, Flex and Stax, with EAL5+ on the older Nano X. The practical difference is auditability: Trezor's firmware is fully open source, while Ledger's BOLOS operating system on the secure element is closed source.
What coins does the Trezor Safe 3 support?
The Trezor Safe 3 supports thousands of coins and tokens, including Bitcoin, Ethereum and ERC-20 tokens, managed through the Trezor Suite desktop and browser app. Trezor also sells a Bitcoin-only version of the Safe 3 that runs firmware restricted to Bitcoin.